3 minutes
How to Deploy your Hugo Site to cPanel Using GitHub Actions
This website is built using a technology called Hugo. Hugo is brilliant because you can write as little or as much html, css, and js as you want. Written in Go, Hugo is a lightweight and immensely fast static site generator. Think Wordpress, but using Markdown instead of PHP. Well I love it and I’ve committed to using it for my personal site. Now that I have a few weeks’ experience under my belt, it’s time to get serious about deployment and organization. And yes, that means no more drag and drop onto Cyberduck. One of the tradeoffs of using Hugo over something like Wordpress is that it doesn’t come with any deployment tools or web host integrations. So if you’d like to get your generated web documents onto your host, you have to do it all manually. Or… you could automate it using GitHub workflows. At this point, you can probably guess where this is going. Let’s get started!
Step 1: git init
Initialize a git repo in the /public folder of your Hugo site directory. If you host anything else where you’ll be deploying your hugo site, add those directories to your gitignore. Make a matching repo on GitHub. Add your files, commit, push.
Step 2: FTP Accounts
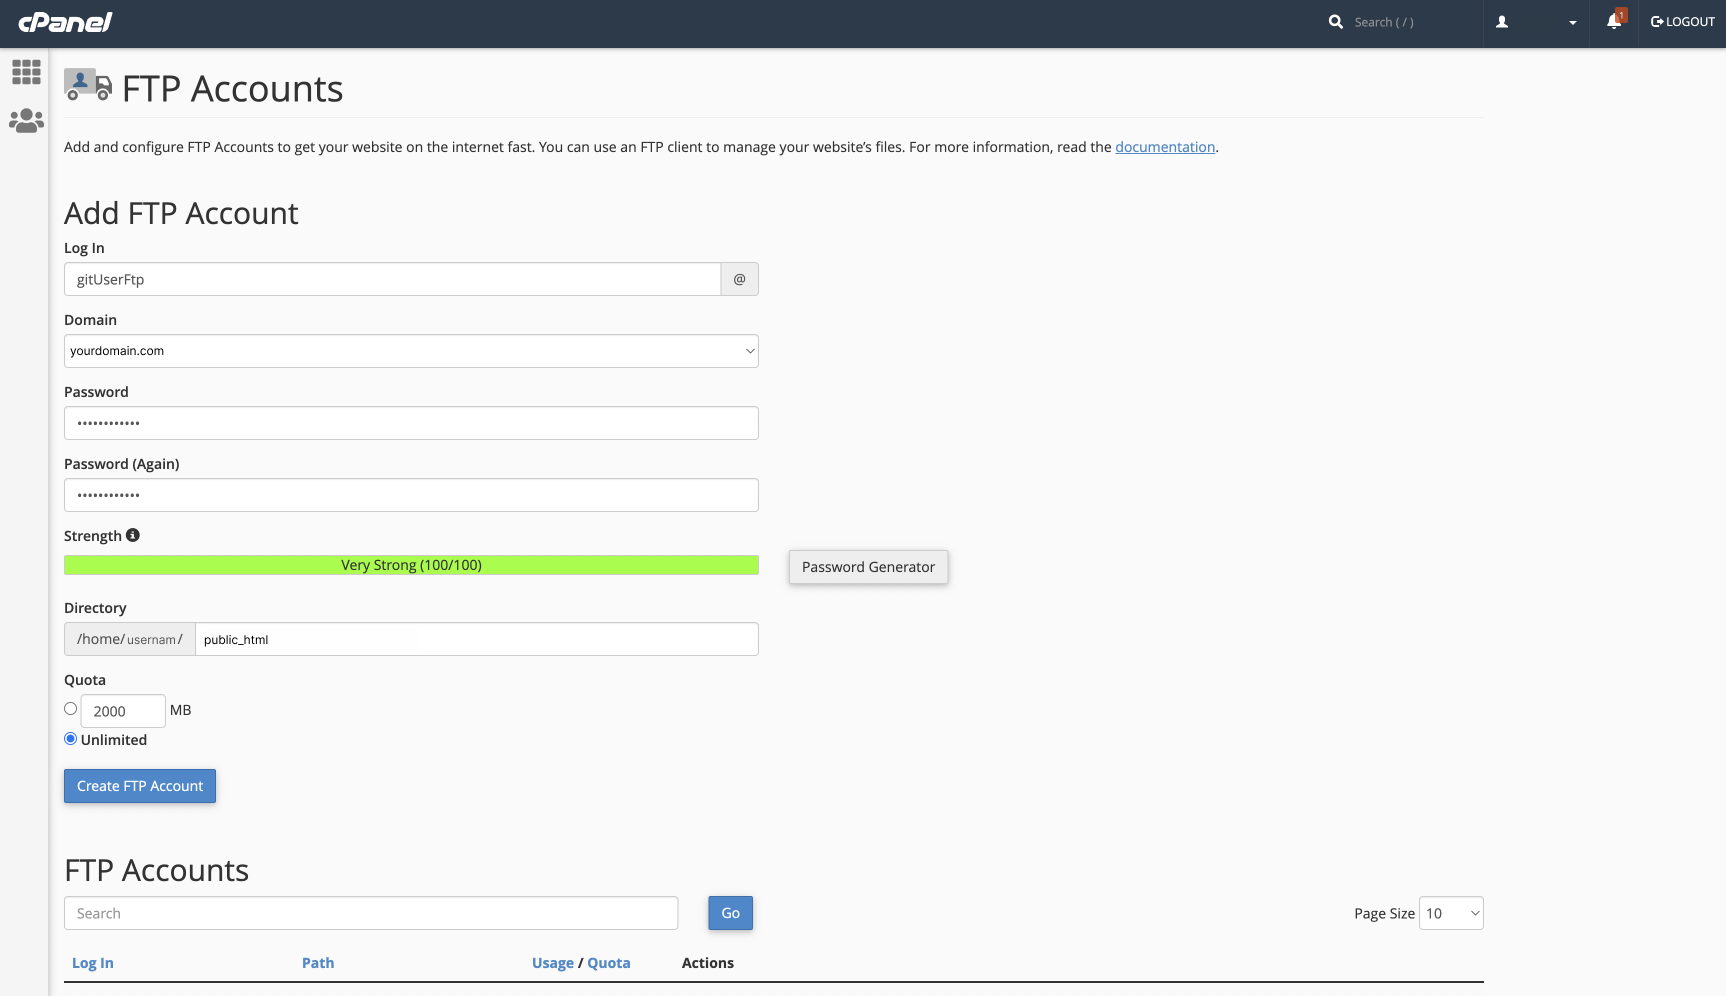
Create a new FTP account on cPanel. Give it a username and password that you’ll remember and tell it where the root directory should be. In my case, I am deploying directly to the public_html folder. If you’re using an add-on domain, make sure you use the root folder of your add-on domain.
Step 3: Secrets
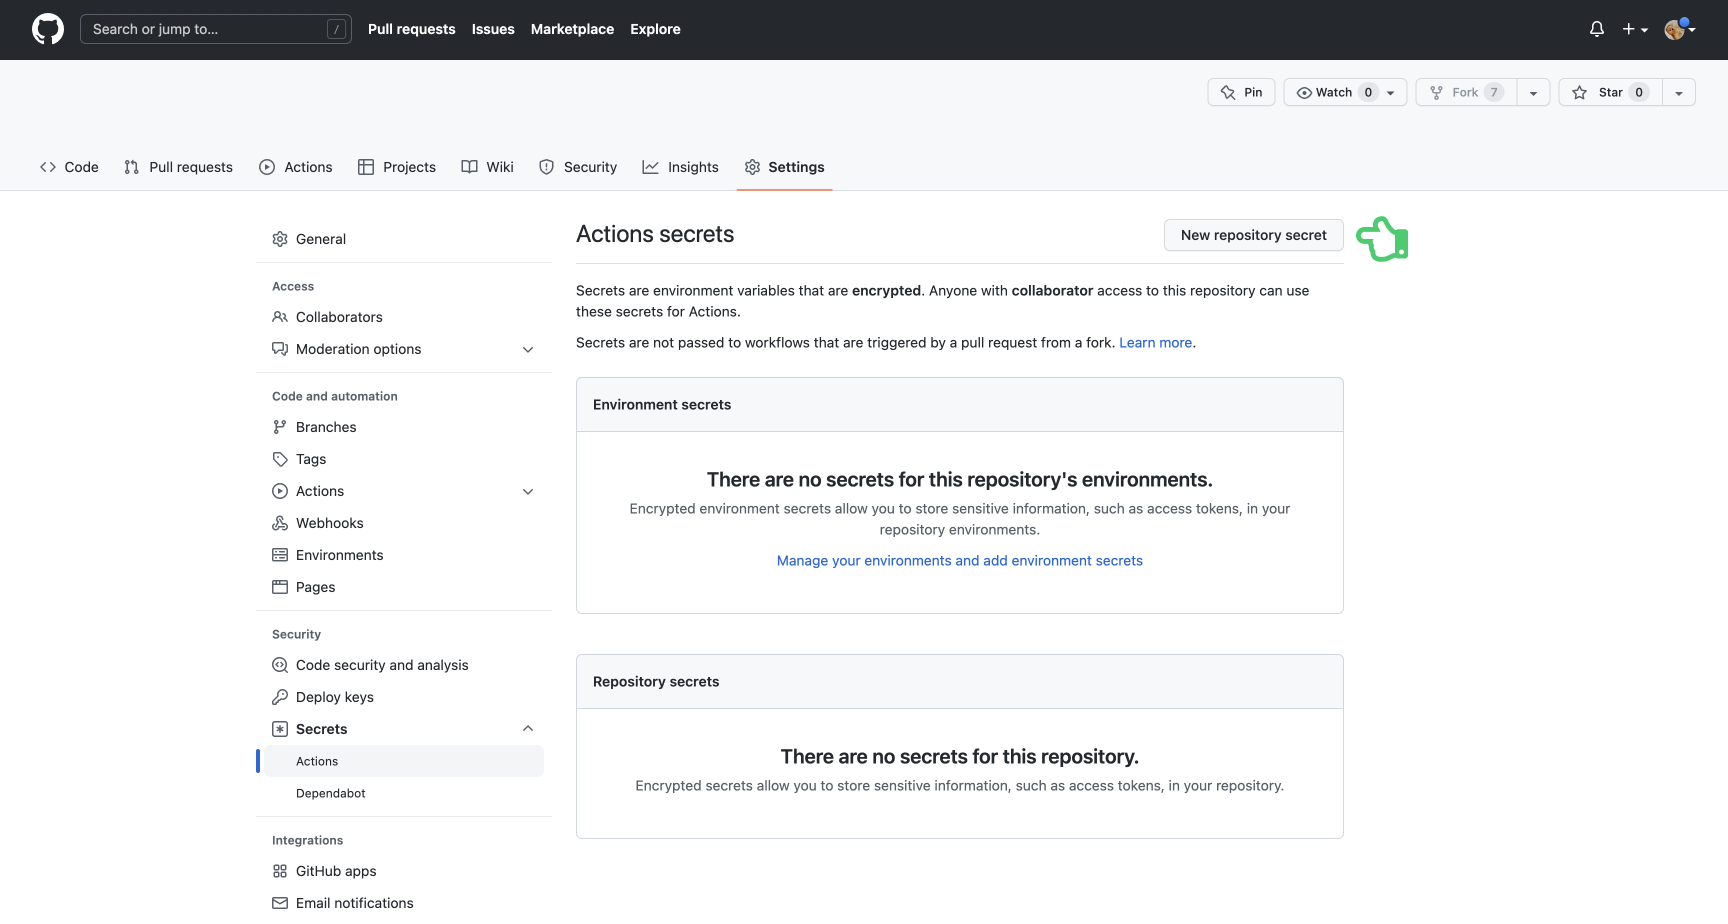
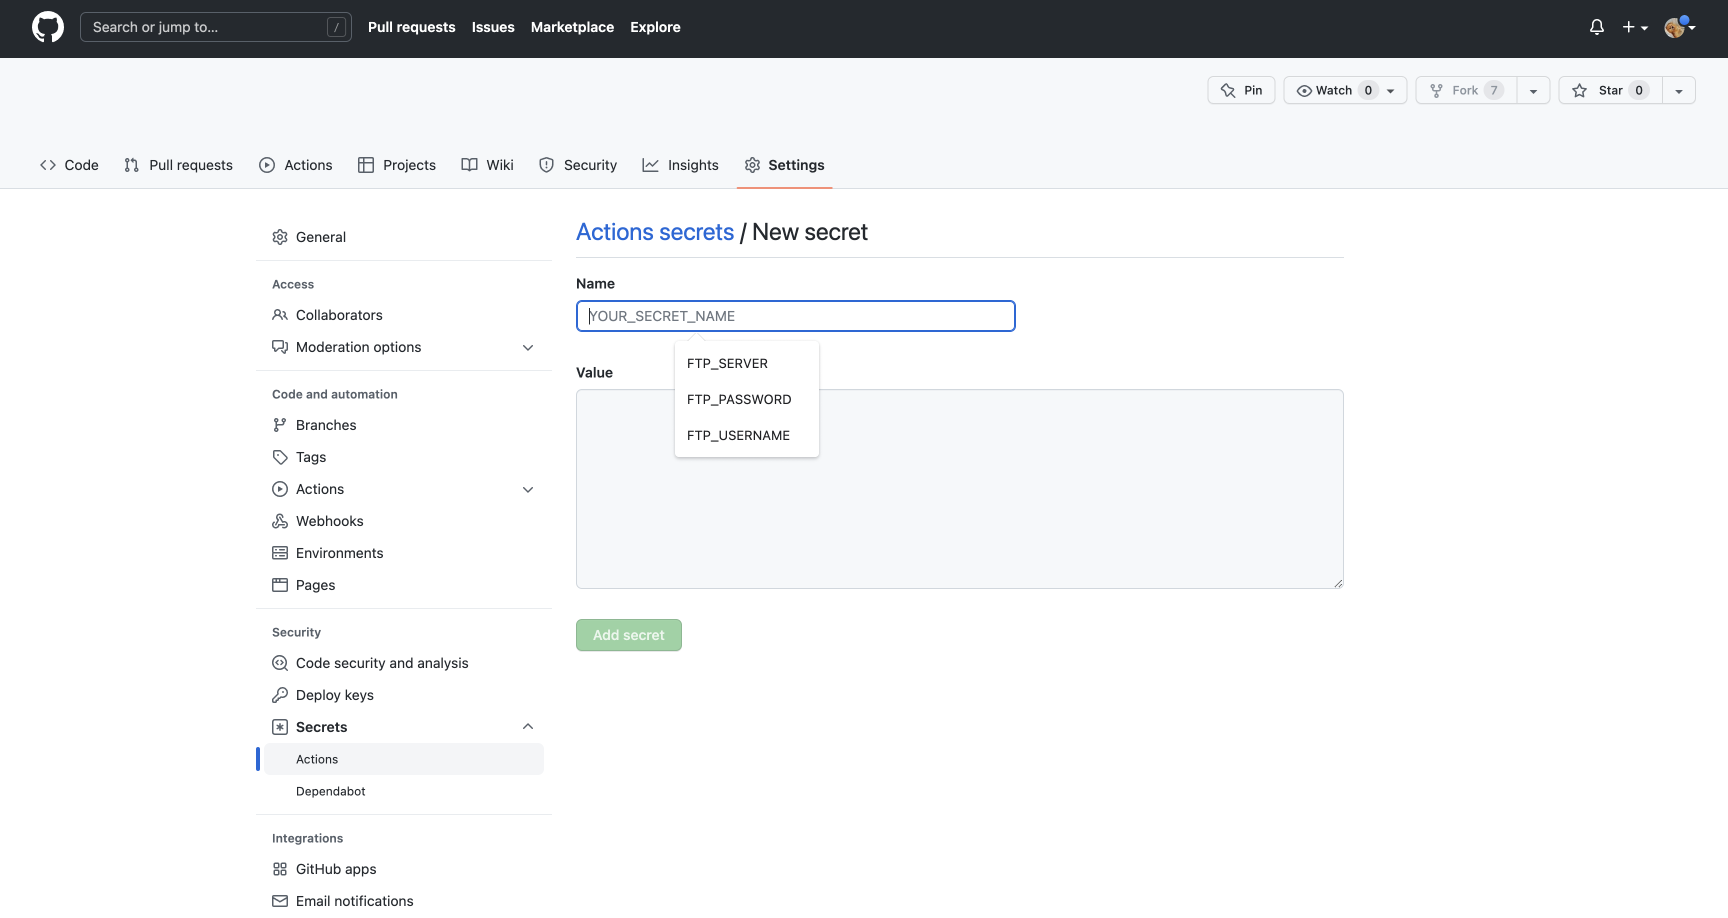
Add the FTP server address, username, and password to your git repo’s secrets at Settings > Secrets > Action Secrets
Step 4: Workflow
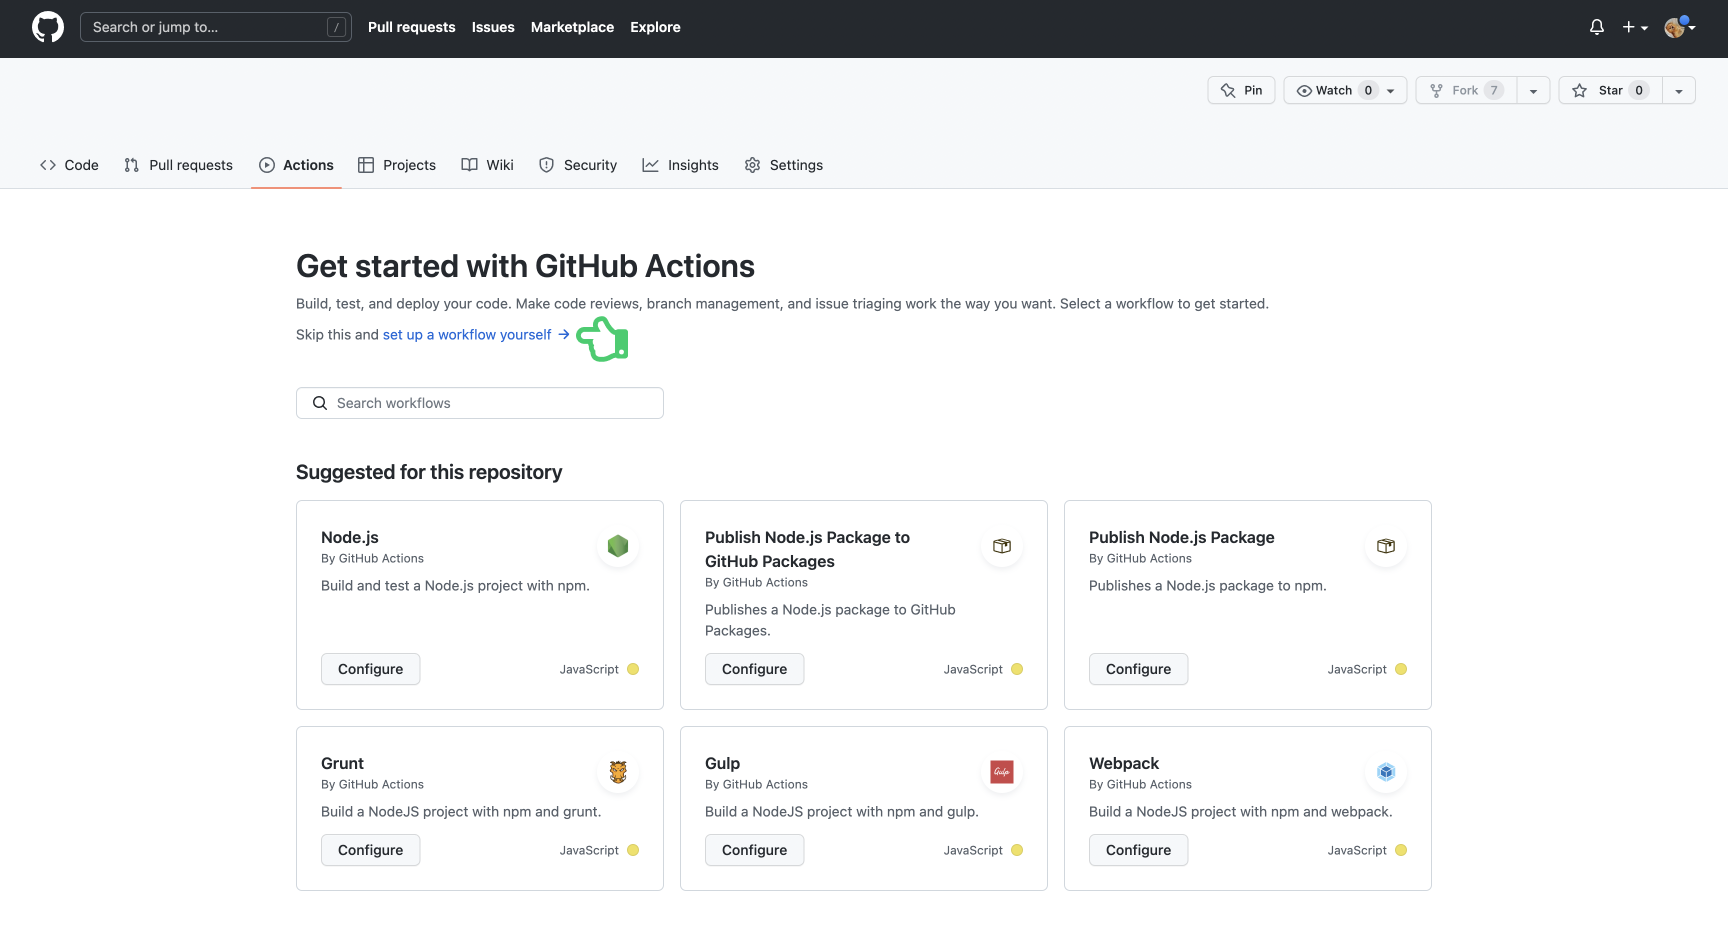
Create a workflow on GitHub at Actions > set up a workflow yourself.
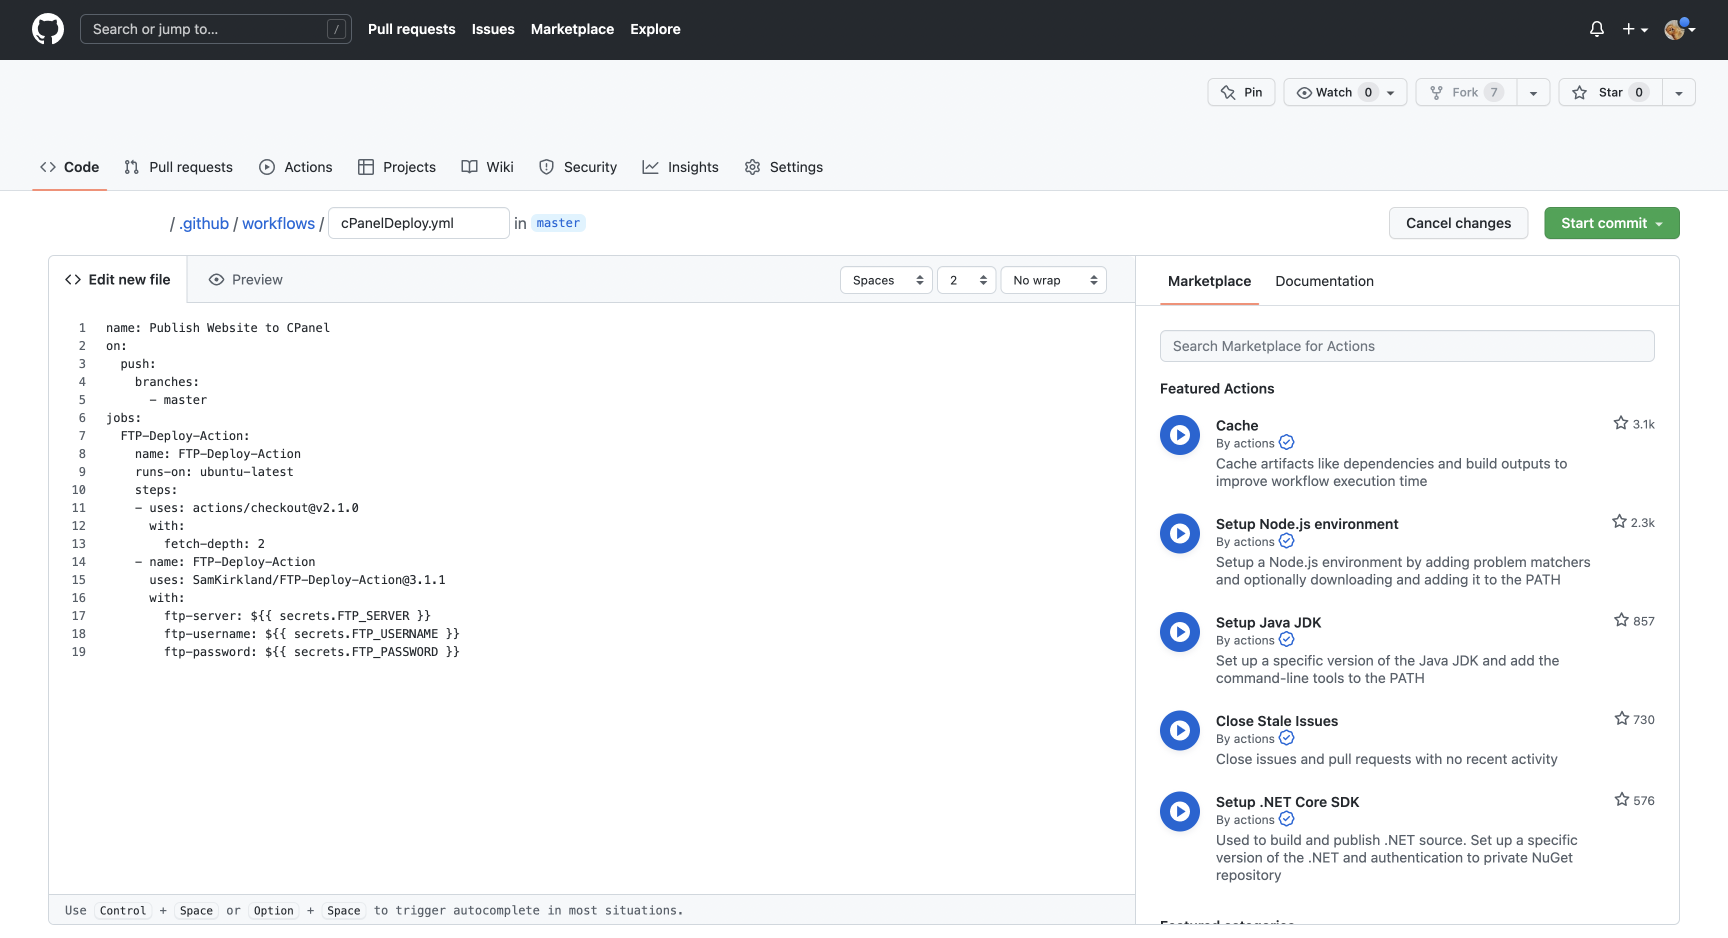
Enter the following code into the yml file:
name: Publish Website to CPanel
on:
  push:
    branches:
      - master
jobs:
  FTP-Deploy-Action:
    name: FTP-Deploy-Action
    runs-on: ubuntu-latest
    steps:
    - uses: actions/checkout@v2.1.0
      with:
        fetch-depth: 2
    - name: FTP-Deploy-Action
      uses: SamKirkland/FTP-Deploy-Action@4.0.0
      with:
        server: ${{ secrets.FTP_SERVER }}
        username: ${{ secrets.FTP_USERNAME }}
        password: ${{ secrets.FTP_PASSWORD }}
Click “Start commit” and commit the new workflow file to the repo.
Step 5: Test
Now, when you push any changes to the repo from your code editor, the changes will be reflected on you hosting platform within a few seconds. In my testing, I find it takes anywhere form 10 seconds to a minute for the workflow to finish running. I would imagine this time increases as the changes get bigger.
Go ahead and run “hugo” from your site’s project folder and then add and commit the changes from the /public folder once the build completes. When you push your changes, look at the workflow in the Actions tab on your GitHub repo. You should see the workflow in progress as your updates push to your host.
Congrats! You’re now a devops engineer.
May, 2023 Update
There was an issue with FTP Deploy v3.1.1, so I’ve updated my action script to 4.0.0. With this change, you also need to update your “with” params. The code block above is working as of May 28, 2023